Friday, April 30, 2010
SO WHAT ARE YOU DOING TOMORROW?...
you know...for national scrapbooking day...yeah...it's that cool it needs its own day!...well...i'm going to be joining the dynamic duo, kristi and chrissy, over at our inspiration station for the whole day!...not sure if they'll be sporting tights and capes, but i know they'll be posting some fantabulous projects!...and what better to celebrate than with some giveaways?...so...hope to see ya there!...
Thursday, April 29, 2010
OMG...AWARDS FOR LITTLE 'OL ME?...
ok...so i know i'm slacking with getting these up...i've just been so busy trying to get some projects together for you guys to enjoy....but while i'm thinking up some new stuff...thought it was about time to thank everyone!...i feel so honored that you thought i should have these!...you like me!...you really like me!...lol...
anywho...i'm going to do my acceptance a bit different...everyone has such awesome blogs that i can't pick just 10 for 'em to go back out to...so i'm giving 'em to everyone!...
this one was my first award...i want to give a big 'ol thank you to jdandi over at that the cricut mb...also...make sure to check out dtsart blog...she's got tons of awesome stuff over there!...couldn't have made my blog button without her!...

now i need to thank cyndi for this one...make sure to check out cyndi's craft corner to see all her awesome work!...she figured out how to use magic scratch paper in the cricut!...talk about cool!...so here's a big 'ol thank you for the beautiful blogger award!..

this one's from just2ducky...make sure to check out just2ducky designs for all her super work....her little scrubbie and glove flower is too cute for words!...so here's a big 'ol thank you for my sweet blogger award!...

now i need to thank kim for this one...you gotta stop over to kreations by kim to see what she's whipping up...her cutie patootie onesies using create a critter are beyond words!...too stinkin' adorable!...so here's a big 'ol thank you for my ms brightside award!...

now...this one's from cindy and i can't believe she thought i was deserving!...you gotta check out crazy for crafting to see what she has to offer!...her stuff is absolutely amazing...and it's so awesome that she shares the way she does!...so a big huge thank you for my crafing queen award!...

thank you again to all you ladies who thought that i was deserving!...i'm beyond words!...
Monday, April 26, 2010
THIS IS REALLY BECOMING A PROBLEM!...
ok...why can i not stop making these?...is it because i'll see cute paper out of the corner of my eye?...then my mind starts racing on what magnets would look super cute?....someone really needs to take these from me!...i wonder if there's a patch to help me kick the habit?...but i promise...this will be it...well...for a couple of days at least!...lol...
so...couldn't leave the boys out!...found this killer paper in the dcwv stack 6...grabbed my indie art cart...and went to town...did a little embossing on the skull with white...cool thing...this ended up being 5 magnets!...


now...came across this cutie paper in the dcwv flower shower stack...and had to pair it up with the galoshes from the paisley cart...grabbed some utee (ultra thick embossing enamel) to make 'em super shiny!...how stinkin' cute are they?...


wanted to use some more of the magnets i picked up from the dollar spot at m's...so...grabbed paper from the k & company greenhouse stack...and mixed it up this time with a satin ribbon...


Saturday, April 24, 2010
THESE THINGS ARE SO ADDICTIVE!...
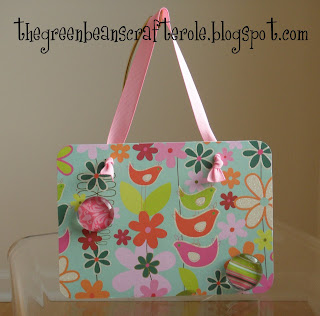
omg....these little magnet boards are like pringles...once you pop...you can't stop!...i'm driving the hubs crazy!...i got 'em on like every door knob in the house!...and you guys were worried that 100 was too many to buy!...lol...
now this one i used straight from the nest for the birdies...and i guess since my head's in the clouds...maybe that's why i feel in love with the paper from the dcwv songbird stack...i wanted to mix it up and did it in a different direction...yeah...i'm crazy like that!...


i love me some skulls...so this one's my fav!...the paper is from the dcwv madly in love stack...killer, right?...wanted to pick up some of the blingage with the magnets...so i did a little embossing on the hearts...oops...forgot to mention that the heart cuts were from don juan...


now with this one...i just used some magnets that i bought from m's in the dollar section...they went perfectly with my new fav paper...k & company greenhouse stack....


Thursday, April 22, 2010
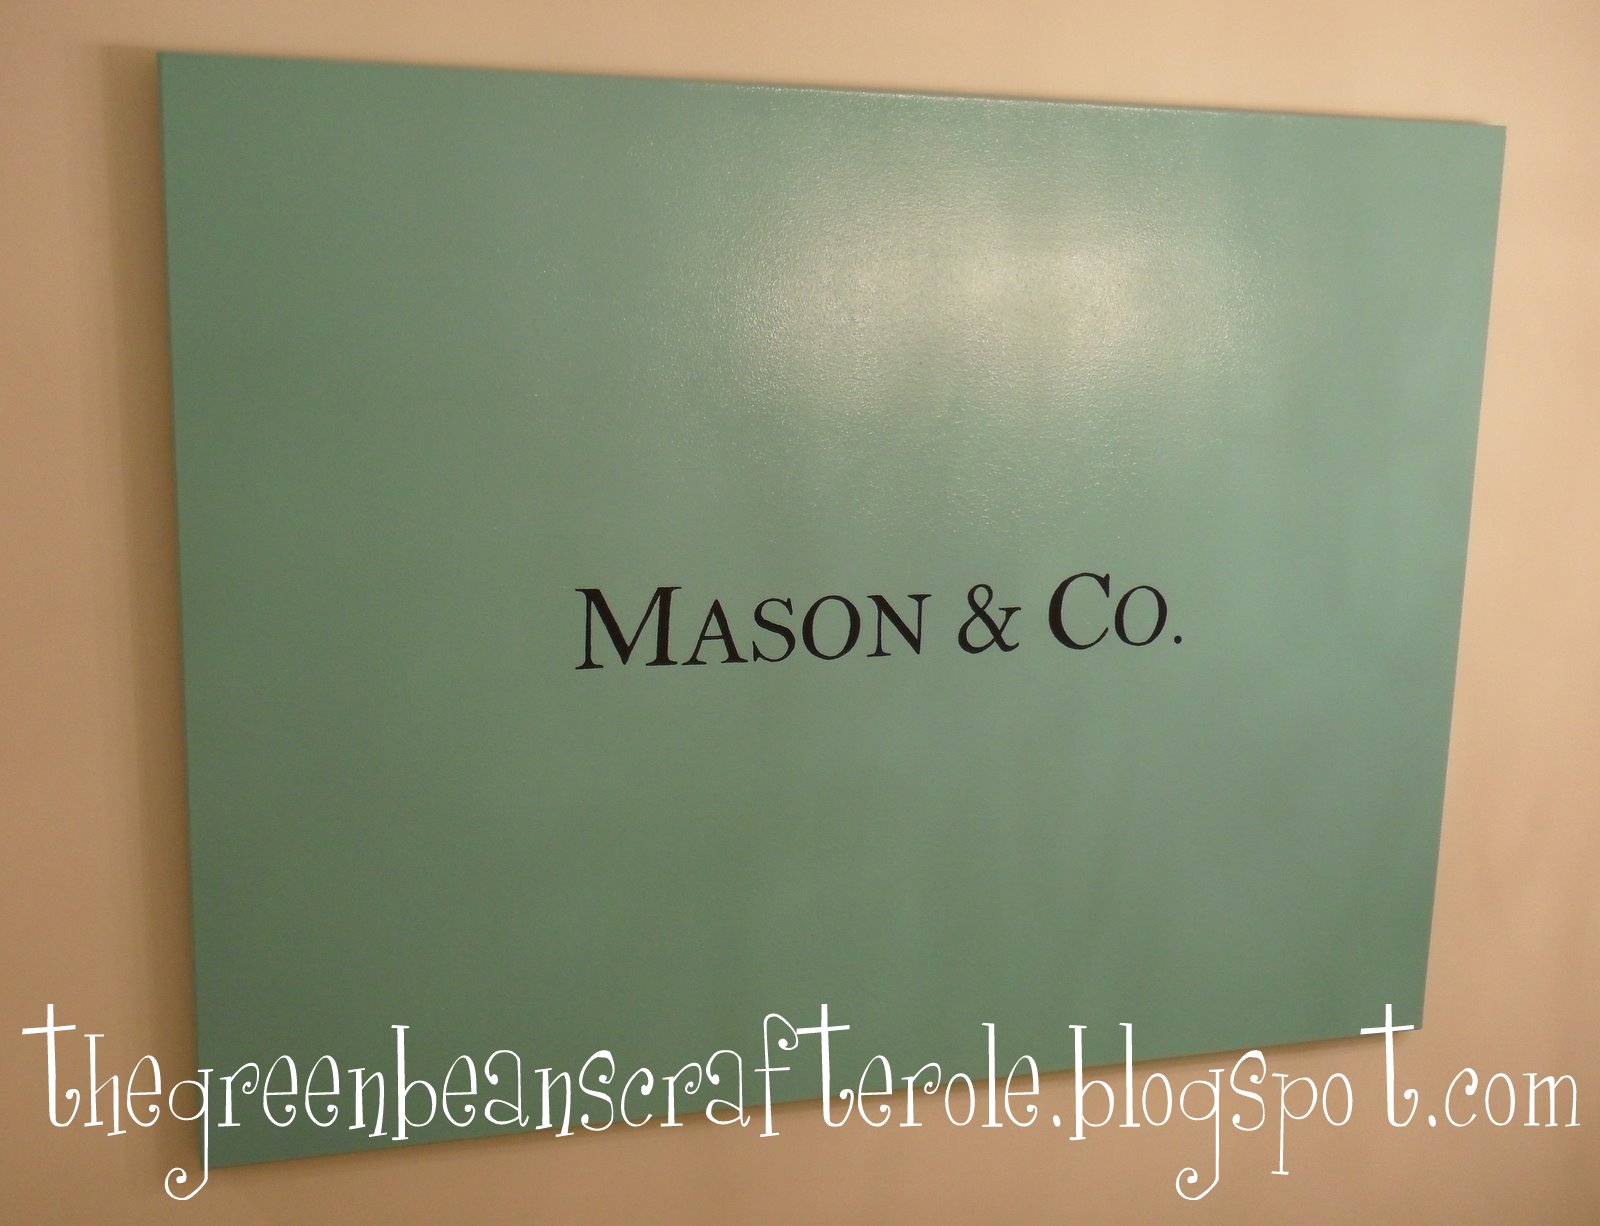
MY NOT SO LITTLE VERSION OF THE LITTLE BLUE BOX...
so what girl doesn't love that famous little blue box with the white ribbon?...well i know i do!...anywho...i might not be the best at math...but i do know...one huge white wall up the staircase + some greenbean flair = one pretty cool home decor project...well...i ended up taking one of those little boxes to home depot and had some high gloss paint tinted a yummy tiffany blue...covered my ginormous canvas...i'm talking 4 foot by 3 foot...and since i'm all about monogramming or personalizing...came up the with play on tiffany and co...and made it mason (my last name) and co...doing this project before i discovered vinyl...i cut the letters from plantin schoolbook and traced 'em...yeah...i went old school...filled 'em in with some acrylic paint...and ta da...something worthy of madison avenue!...

Wednesday, April 21, 2010
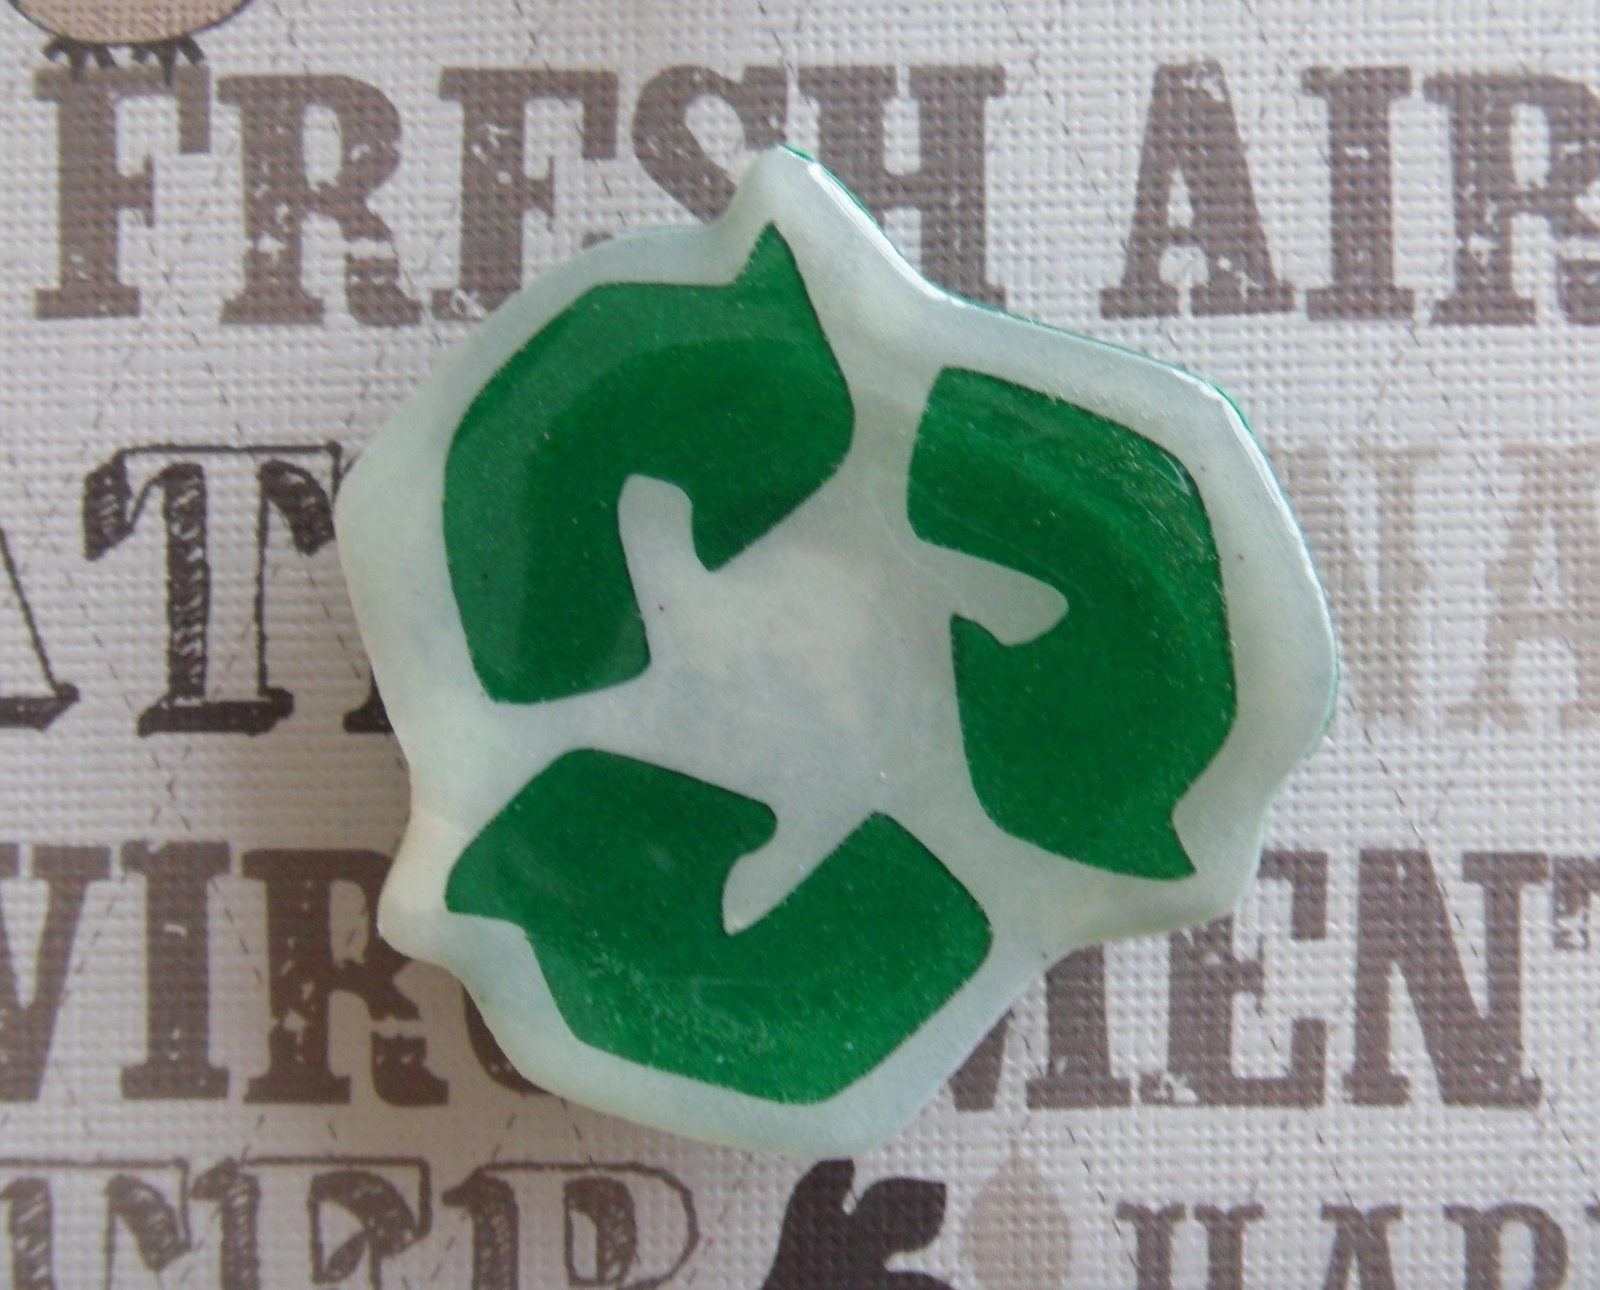
CELEBRATE EARTH DAY IN A MAGNETIC WAY...
so...with earth day coming up...i just had to use my give a hoot cart...then...i saw this beyond adorable mini magnet board vid chic 'n scratch did...and i just had to do 'em!...who'd a thunk it to go in the roofing section for crafting supplies?...well...i'm glad someone did...because these are my new addiction!...


these little guys use a 5 X 7 galvanized roof step flashing...of course my store didn't have 'em...so i orderd off of amazon (came in quanties of 100...so that should last me until the weekend...lol)...then you pick whatever patterned paper you want to use..i reached for my dcwv green stack...how eco-riffic!...trimmed any paper poking over...did a little sanding...just to smoothe the sides..used my corner chomper to round the edges...punched tho holes with the big bite...and added some matching ribbon for a hanger...then needed to create some magnets...i cut the recycling symbol off give a hoot at 2 1/2 inches...finally broke out the utee (ultra thick embossing enamel) to make 'em thick and glossy!...slapped a magnet on the back...and there you go...one eco chic project with it's own magnetic personality!...
click here if you want to see where i ordered from...just save some for the others!...lol...
Monday, April 19, 2010
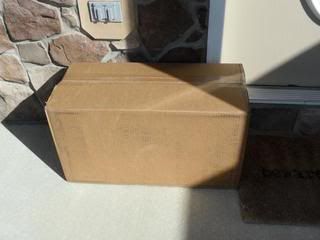
CRICUT CAKE TO DO LIST...
step one...carry box inside house...check...
step two...open up box...check...
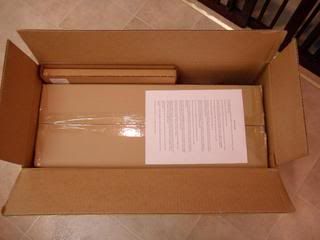
step three...look at all the goodies...check...
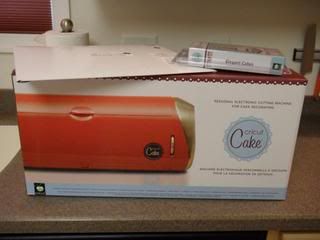
step four...take a ridiculous pic...check...
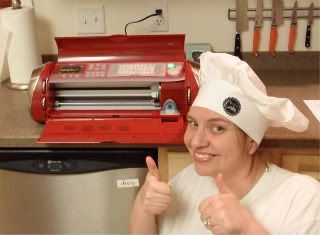
step five...learn how to bake...to be continued...
step two...open up box...check...
step three...look at all the goodies...check...
step four...take a ridiculous pic...check...
step five...learn how to bake...to be continued...
Sunday, April 18, 2010
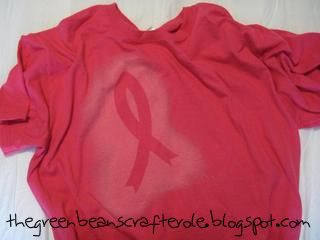
CHLORINE COUTURE...
so...i've been itching to try one of these...and i finally got to!...saw this method done by mirandaevans1 on the cricut mb...hers are killer!...click here to check out her etsy shop!...but i was pretty proud of mine!...a friend is doing the 3 day breast cancer walk...and i jumped at the opportunity to make her something!...finding a cure to breast cancer is something very near and dear to my heart...my mother lost her battle to this horrible disease 5 years ago...so anything that i can do to help...i'm there!...
this technique is so easy...and the end results are way cool!...take freezer paper...you can get this at walmart or any grocery store...cut to fit your mat...and put shiny side up...pick whatever image you want and cut...but make sure to flip!....then you're going to iron it onto your tee...shiny side down....that's the reason for the image flipping....put some cardboard in between your shirt...take 1/2 water and 1/2 bleach and put in a plastic mister bottle...and mist away!...i found that the mister works better than a spray bottle...because you don't want to soak the freezer paper or it won't have crisp edges...let it do it's bleaching thing...then with cold water...rinse really well...making sure you get all that bleach out!...you can do a little hand washing at this time if you want...but since i did a couple...i ended up doing a small load of wash...and there you go...a little chlorine couture!....
this technique is so easy...and the end results are way cool!...take freezer paper...you can get this at walmart or any grocery store...cut to fit your mat...and put shiny side up...pick whatever image you want and cut...but make sure to flip!....then you're going to iron it onto your tee...shiny side down....that's the reason for the image flipping....put some cardboard in between your shirt...take 1/2 water and 1/2 bleach and put in a plastic mister bottle...and mist away!...i found that the mister works better than a spray bottle...because you don't want to soak the freezer paper or it won't have crisp edges...let it do it's bleaching thing...then with cold water...rinse really well...making sure you get all that bleach out!...you can do a little hand washing at this time if you want...but since i did a couple...i ended up doing a small load of wash...and there you go...a little chlorine couture!....
Wednesday, April 14, 2010
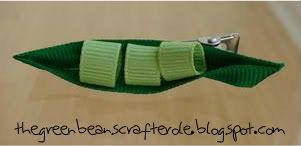
PEAS ENJOY ANOTHER BARRETTE...
well...until i figure out a way to do a greenbean barrette...peas with have to do!...this one's super easy to do...i like using grosgrain...seems to be a bitter studier...just take your two pieces of darker green ribbon...now cut at about 2 1/2 inches...and fabric tac one long side of each ribbon together...then cut at a angle on each end to finish the pod...now for the peas...take a lighter green ribbon...cut at about 1/2 inch...using the fabric tac, attach the ends to each other to form a circle...when you have your three peas...attach to pod...pick a barrette...then using some super glue...slap 'er on there!...now you have a "pod"sitively adorable hair clip!...
Monday, April 12, 2010
TOPIARY WITH A TWIST...
so...i found these cute little buckets in the dollar spot at target...and the wheels started turning...i wanted to do a topiary...but not your ordinary one...i grabbed a bath scrubbie and started to create!...now...i filled the bucket up with bath confetti...but you can put whatever in it!...candy, bath salts, anything you can think of!...topped this little cutie off with a butterfly from the give a hoot cart...but again...whatever you want to slap on there...got for it!...


wanna know how it's done?...well...here's a tutorial that i whipped up...
you'll need...
wooden dowel cut at 9"
ribbon to cover dowel...or paint it...whichever is easiest...
empty cardboard ribbon thingie (sorry for the technical term...lol)
ribbon for bow
whatever goodies to fill bucket...
embellies to make it look purty
bucket...i know this isn't the one in the rest of the tutorial...had to take a pic afterwards...so think of this as a stunt bucket...

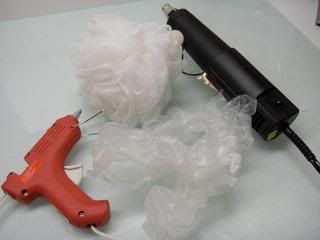
you also need:
heat gun
oops...forgot the shrink wrap...but you'll need that or cello
glue gun
bath scrubbie
plastic wrap, paper towels, or whatever to use as a pre filler
first you want to prep the wooden dowel...i covered with ribbon...but you can certainly paint it...

next..you'll want to take empty ribbon thingie and hot glue the dowel into the hole...i actually do this when it's inside the bucket...just push the ribbon thingie as far down as it'll go...then insert the dowel...make sure it's straight and hot glue away...
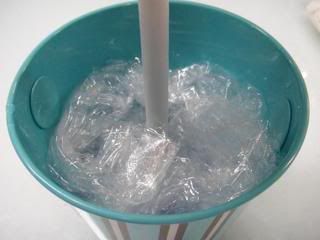
then...you'll want to take either your saran wrap or whatever you're using to kinda fill in before adding your goodies...you know...something to take up space...other than our husbands!...ohhh...sorry...i just had to...
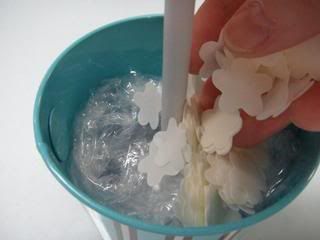
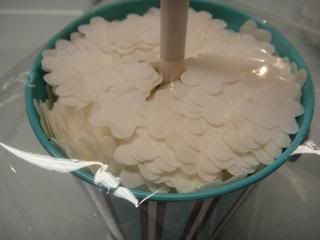
now it's time to add the goodies...like i said...i used bath confetti...but sky's the limit on what you want to use...
fill all the way to the top...
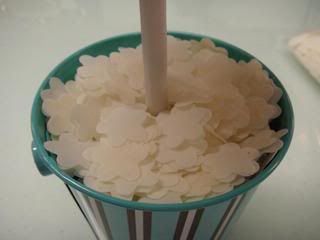
here's what you should have...a headless topiary...nevermind the mess...just focus on the project...hee hee...
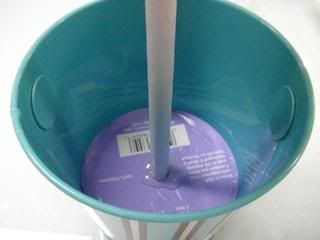
now you'll take your shrink wrap...making sure that it'll cover the sides of the bucket all the way to underneath it...find the center of it...and cut a tiny circle...just big enough to fit around the dowel...i folded it in half...used a hole punch...and then trimmed a little bit more to get the size i needed...slip the dowel through the hole and slide all the way until it's flat on the confetti...
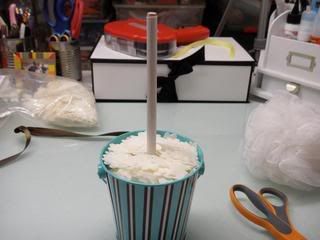
this is the point where you'll take all the shrink wrap and smooth down the sides of the bucket and tape underneath...then you'll take your heat gun and shrink away...but you can certainly use cello for another look!...you'll just cut a square big enough...gather up and tie!...now this pic is post shrinking...but you can see how it's taped underneath...only heat up the sides and top...don't worry about the bottom...if it's not sitting level...then maybe hit it with some heat...

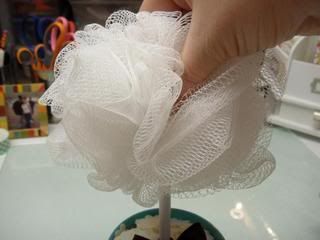
take your bath scrubbie and put on top of dowel...
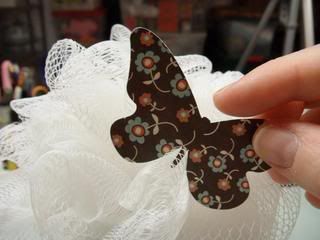
add your butterfly (woah...where'd his antennae go?) and bow at base and you're done!...
***like i said before...anything is interchangeable with the project!...i just wanted to keep with a bath type theme...so that's why i used the confetti...also...i mentioned that you can you cello to wrap it up...since the bow's at the base (cleverly disguises the hole) it's nothing to have it gathered up with a bow!...let me know if you have any questions!...or if my directions were crappy!...


wanna know how it's done?...well...here's a tutorial that i whipped up...
you'll need...
wooden dowel cut at 9"
ribbon to cover dowel...or paint it...whichever is easiest...
empty cardboard ribbon thingie (sorry for the technical term...lol)
ribbon for bow
whatever goodies to fill bucket...
embellies to make it look purty
bucket...i know this isn't the one in the rest of the tutorial...had to take a pic afterwards...so think of this as a stunt bucket...
you also need:
heat gun
oops...forgot the shrink wrap...but you'll need that or cello
glue gun
bath scrubbie
plastic wrap, paper towels, or whatever to use as a pre filler
first you want to prep the wooden dowel...i covered with ribbon...but you can certainly paint it...
next..you'll want to take empty ribbon thingie and hot glue the dowel into the hole...i actually do this when it's inside the bucket...just push the ribbon thingie as far down as it'll go...then insert the dowel...make sure it's straight and hot glue away...
then...you'll want to take either your saran wrap or whatever you're using to kinda fill in before adding your goodies...you know...something to take up space...other than our husbands!...ohhh...sorry...i just had to...
now it's time to add the goodies...like i said...i used bath confetti...but sky's the limit on what you want to use...
fill all the way to the top...
here's what you should have...a headless topiary...nevermind the mess...just focus on the project...hee hee...
now you'll take your shrink wrap...making sure that it'll cover the sides of the bucket all the way to underneath it...find the center of it...and cut a tiny circle...just big enough to fit around the dowel...i folded it in half...used a hole punch...and then trimmed a little bit more to get the size i needed...slip the dowel through the hole and slide all the way until it's flat on the confetti...
this is the point where you'll take all the shrink wrap and smooth down the sides of the bucket and tape underneath...then you'll take your heat gun and shrink away...but you can certainly use cello for another look!...you'll just cut a square big enough...gather up and tie!...now this pic is post shrinking...but you can see how it's taped underneath...only heat up the sides and top...don't worry about the bottom...if it's not sitting level...then maybe hit it with some heat...
take your bath scrubbie and put on top of dowel...
add your butterfly (woah...where'd his antennae go?) and bow at base and you're done!...
***like i said before...anything is interchangeable with the project!...i just wanted to keep with a bath type theme...so that's why i used the confetti...also...i mentioned that you can you cello to wrap it up...since the bow's at the base (cleverly disguises the hole) it's nothing to have it gathered up with a bow!...let me know if you have any questions!...or if my directions were crappy!...
Friday, April 9, 2010
INTRODUCING MY NEWEST DESIGNER....
wanted you ladies to meet the newest member of team greenbean...now...she hasn't done much in the actual design process...kinda hard when you don't have opposable thumbs...she's more of a behind the scenes kinda gal...but she does approve all my creations before i share them...she also spends countless hours by my side (more like on my lap) in the crafting cave...so without further adieu...chloe renee....insert applause here...
now...this is her getting down to business (and secretly wanting to bite me...lol)...

and this is her on the off days...

yeah...i'm one of those people who think their pupper is more than a pet!...but she just had to make an appearance!...i know...i'm a goober!...it's friday...what do you expect?...hee hee...
now...this is her getting down to business (and secretly wanting to bite me...lol)...
and this is her on the off days...
yeah...i'm one of those people who think their pupper is more than a pet!...but she just had to make an appearance!...i know...i'm a goober!...it's friday...what do you expect?...hee hee...
Thursday, April 8, 2010
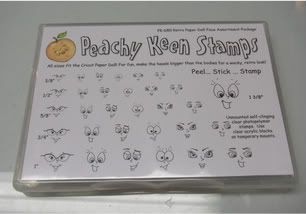
ISN'T THIS NEW STORAGE JUST PEACHY?...
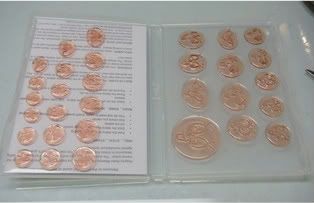
so...i don't have many sets of peachy keen stamps...but the ones i do have...the packaging seemed to be a bit awkward...well...problem solved!...stampin up has the best storage cases for their new clear mount stamps...kinda like dvd cases...and you can buy empty ones!...anywho...i thought...hey...wonder if my peachy keens and fit in there?...and the answer is yes!...the whole darn assortment can!...i just cut the down printed insert that shows all the stamps and the sizes and slipped it into the front...pretty nifty, huh?...
Sunday, April 4, 2010
HERE'S YOUR FIVE SERVINGS OF FRUIT FOR THE DAY...
saw how to do these little cute stamped tea light candles on not so idle hands and just had to try them...the others were done with christmas type stamps...but i thought some fruit slices would be super cute!...


you need to start out with tissue paper, heat tool, tea light candles, and a super tiny hole punch...

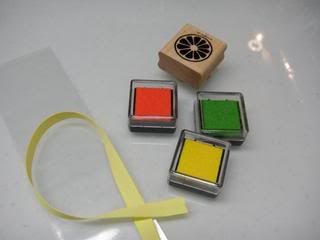
then you'll need your inks, stamp (i used the fruit slice from stampin up's tart & tangy), pretzel bag, and whatever ribbon you want to tie 'em up with...
stamp your images on the tissue paper...
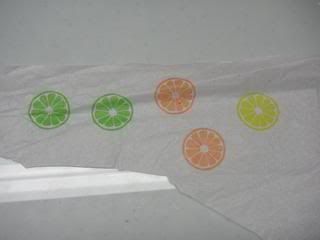
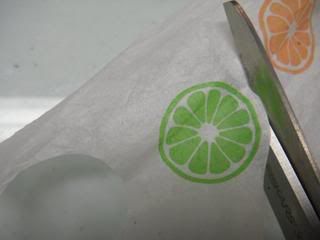
cut around images...making sure that the tissue paper will fit on the candle...
punch holes in center with tiny hole punch...
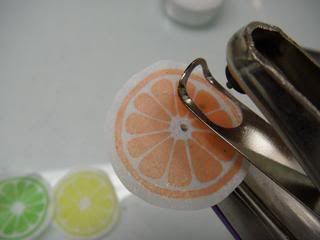
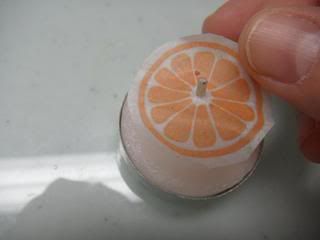
slip tissue paper onto the candle putting the wick through the hole...
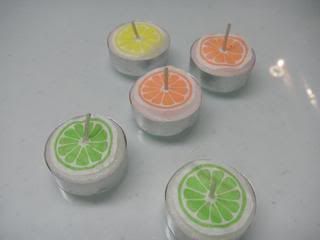
here's all the candles ready to roll...
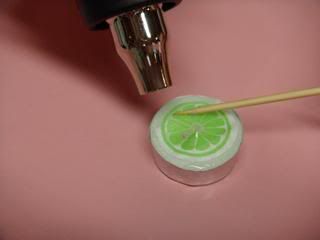
using your heat gun...and a wooden skewer...it gets hot!...adhere the tissue paper to the candle...it'll have a glossy almost melted look to 'em...make sure you get all the wrinkles out when heating...want it to be as smooth as possible...
let cool and there you go!...here's the finished product!...

****to package up...just slip candles into a pretzel bag and tie up!...oh...forgot to mention...these are really for decoration only...but...you could melt the wax and remove the design if you wanted to the burn candle...


here's what to do to make your own!...
you need to start out with tissue paper, heat tool, tea light candles, and a super tiny hole punch...
then you'll need your inks, stamp (i used the fruit slice from stampin up's tart & tangy), pretzel bag, and whatever ribbon you want to tie 'em up with...
stamp your images on the tissue paper...
cut around images...making sure that the tissue paper will fit on the candle...
punch holes in center with tiny hole punch...
slip tissue paper onto the candle putting the wick through the hole...
here's all the candles ready to roll...
using your heat gun...and a wooden skewer...it gets hot!...adhere the tissue paper to the candle...it'll have a glossy almost melted look to 'em...make sure you get all the wrinkles out when heating...want it to be as smooth as possible...
let cool and there you go!...here's the finished product!...

****to package up...just slip candles into a pretzel bag and tie up!...oh...forgot to mention...these are really for decoration only...but...you could melt the wax and remove the design if you wanted to the burn candle...
Subscribe to:
Posts (Atom)